This was my first decoupage project ever and I did it on the fly with a few materials I was given for free. I just did it because I thought I could. I didn’t do a lot of research into decoupage, nor did I worry too much about the process as I was doing it. Since then, I have tried a variety of decoupage techniques, but I find the simpler, the better, and I tend to use these very same steps. I am always learning, though.
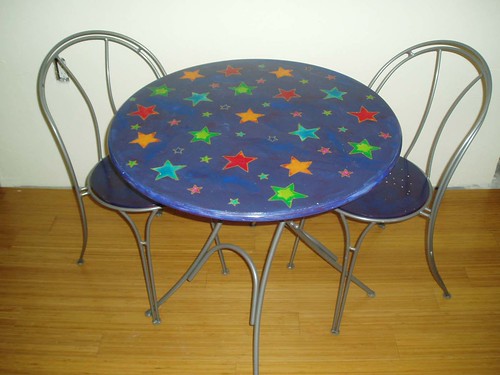
The table was a hand-me-down from someone who purchased it at Ikea, but I can’t find it any longer on the Ikea site and, sadly, I’m too far away to go look for myself. But these techniques should work with any wood furniture. If you're really attached to the furniture and/or a perfectionist, you may wish to practice on something else first.
Supplies needed:
table and chairs, sandpaper, paper cutouts to be decoupaged, gesso, acrylic paints, glue (Mod Podge or other decoupage glue), polyurethane, brushes
The simple steps:
1. Take everything apart and sand the wood.
2. Cover with gesso and then paint.
3. Glue paper shapes to the painted surfaces with mod podge.
4. Varnish with many layers of polyurethane.
The detailed steps:
Preparation:
1. Unscrew table top from base and chair seats from frames.
2. Lay the table top and seats on a tarp or other okay-to-get-paint-on-it surface.
3. Sand wood lightly.
Painting:
4. Cover all to-be-painted surfaces with gesso.
(If you’re unfamiliar with gesso, it’s acrylic primer found in art/craft stores and pronounced “jesso,” as I learned when I had to buy it the first time for myself and asked for “gesso” with a hard “g.” In my opinion, you don’t need expensive gesso, paint or brushes for this project. Buy them cheap. I used the cheap black foam brushes and threw them away when I was done.)
5. Paint all to-be-painted surfaces with as many coats as you need to achieve the hue you want. Let dry between each coat, unless you want to blend colors, in which case, apply the colors at the same time.
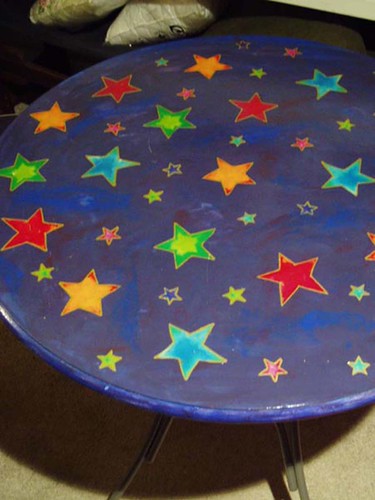
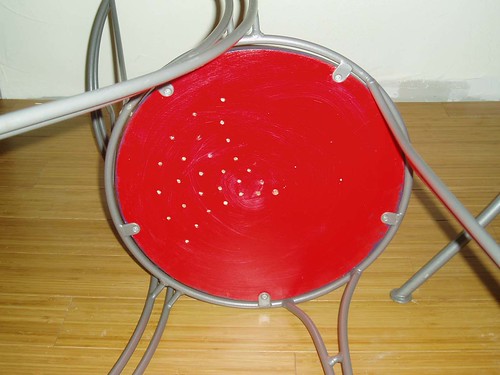
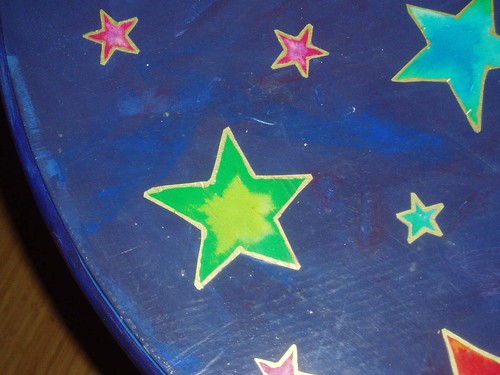
(I used only blue and red on this. I painted the underside of the table and chair seats red and let them dry. Then I painted the top surfaces with both colors: I mixed the blue and red on a tray to make purple, then blotched together red, blue and purple on the table, and blended them to get the look I wanted. I also went for a scratchy look, which has been great as I've moved the table from place to place - any dings looks sort of intentional. To know the drying time for each coat of gesso, paints, glue and polyurethane, read the manufacturer’s instructions.)

Decoupage:
6. Cut out the paper pieces while the paint dries.
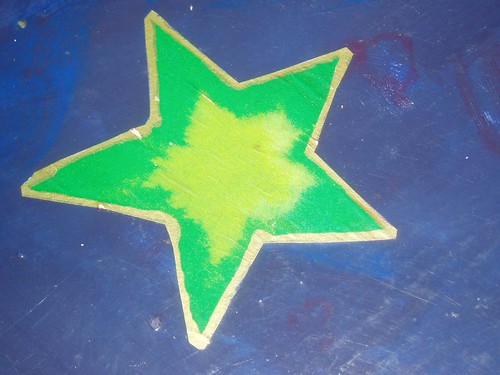
(I cut these stars out of wrapping paper. I really like using wrapping paper, because it’s so thin that, if you get bubbles as the paper gets wet with glue, you can sort of crush them out with your hand. You will usually end up with a crinkly effect, but I like that look, and at the end, the finish will make the whole table very smooth to the touch. If you want it to look and be smooth from the start, try heavier paper and carefully smooth it out from the inside to the outer edge. If you use magazine cutouts, be warned that the text or images on the back might be visible through the paper.)
7. Spread Mod Podge or some other decoupage glue over the surface in a thin but total layer. Lay the paper pieces on the table in the arrangement you want. Spread another thin layer of the glue/podge on top of the paper pieces. Let that dry.
(If you do see bubbles you don’t want after the glue dries, the recommended technique is to cut a tiny “x” with a craft knife and push a little glue down there before putting the “x” back together so that the edges of the x overlap. I have tried this with mixed results. As for the glue, different decoupagers have their favorite products, such as wallpaper paste, spray adhesives and others. I like Mod Podge, and have not had any problems with it)
Finish:
8. Finally, I coated everything with three or four thin layers of polyurethane. This is the part of the process that takes the longest, because of drying times between coats.
(I used Anita’s Water Clean-Up Polyurethane and found that an 8 oz. jar was more than enough for this one project, but you can buy a gallon of polyurethane at a paint store if you like. The very best thing about this finish is that every time I’ve discovered a water ring or such on the table, I have just brushed another coat of polyurethane on the table and the mark has gone away.)
9. I recommend waiting at least 24 hours to use it even if the whole thing is dry to the touch.


No comments:
Post a Comment