Saturday, January 26, 2008
Table Therapy
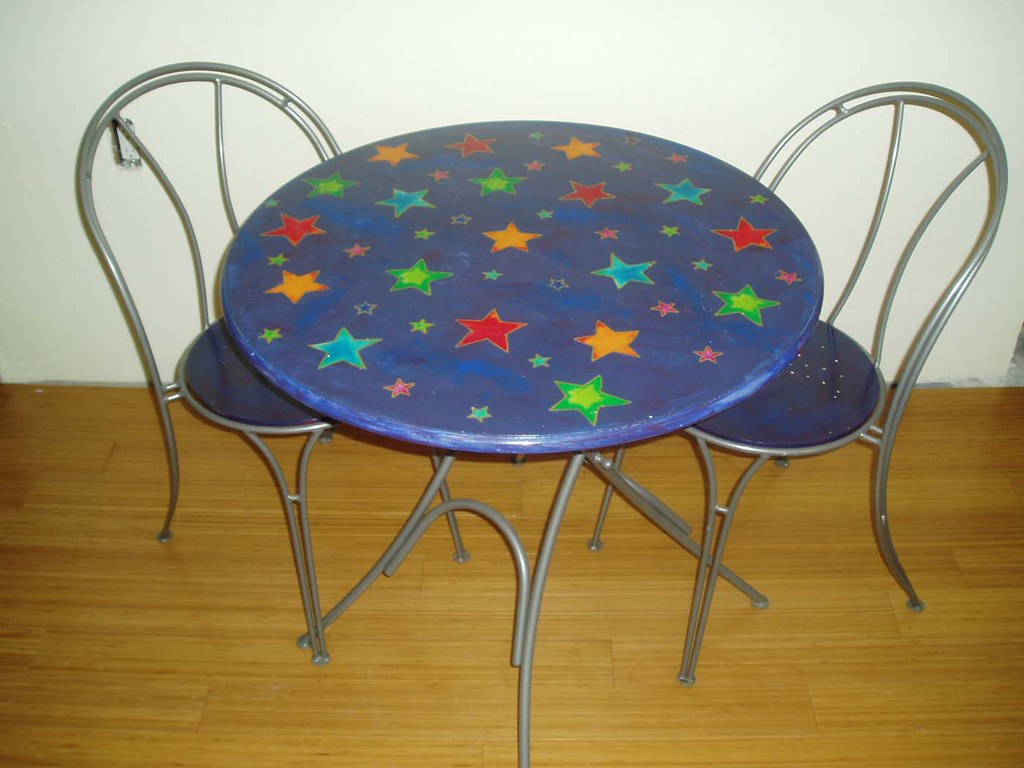
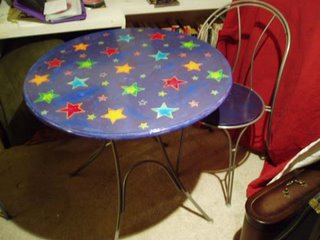
I am honored to discover that my beloved table has inspired others, one of which was featured today on Apartment Therapy's ohdeedoh blog. Isn't it beautiful?
Thursday, April 12, 2007
Raggedy Betty
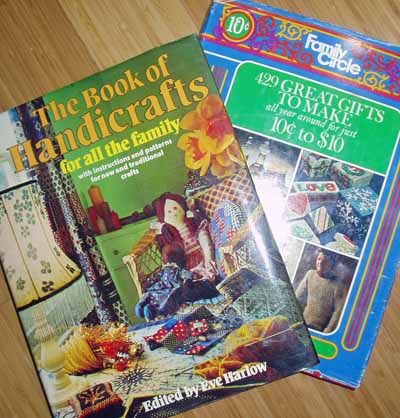
A few weeks ago, I got this little yen to make something by hand for my little sister, sweet Olivia. I think the idea was sparked by my mom's gift of these old craft books from her shelves:
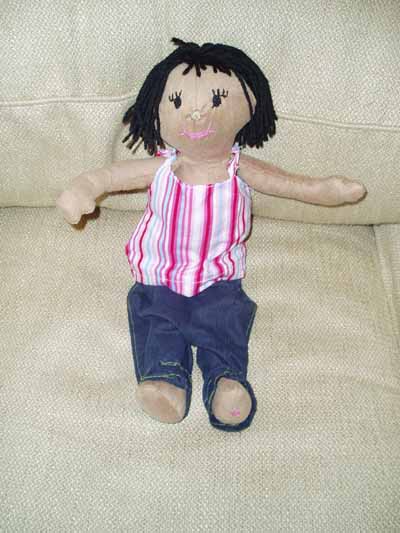
I found a pattern for a rag doll in the book on the left, and decided it would be the perfect thing, even though I haven't made any stuffed creatures before, and this one had a lot of pieces. In my usual cavalier, I-have-no-idea-how-to-do-this-but-I-will-figure-it-out-as-I-go manner, I went ahead and made a doll.
Of course, since I am still a bumbling beginner when it comes to sewing machines, I decided it would actually just be easier to sew the doll by hand. This was not an unpleasant experience. Sort of meditative, really. It's sort of like driving a stick versus an automatic. The automatic might be simpler, and easier on the knees, but driving a stick keeps you focused and truly involved with the driving.
I did have to alter some features, including the rotating arms, to eliminate small baby-unsafe pieces.
I'm quite proud of her facial features, considering that, in spite of the fact that I've owned a small mountain of embroidery thread for many years, I have never embroidered anything in my life. I tried making a stem stitch, which I looked up online after reading the instructions on the pattern, but it ended up being more of a fill-in-the-blanks stitch.
I have sewed by hand off and on since I was young, but during the making of Betty I learned a few new, very useful things about hand-sewing:
1. It is totally possible to draw blood with the eye end of the needle.
2. So you should use thimbles.
3. Cut lots of extra fabric, above and beyond the pattern's seam allowance. And make sure that both arms are the same size.
4. It would be a good idea to actually buy some thimbles and keep them around.
5. Band-aids are always useful.
6. It will take three times as long as you think it will.
7. Thimbles.
By 10 p.m. the night before I drove up to New Jersey, Al and I were channeling Project Runway at the dining table, me frantically cutting and recutting fabric for Betty's clothing, trying to make patterns by sight, while he stitched with a machine that stuttered and jammed every five minutes or so. And unfortunately, I didn't judge the clothing dimensions well, so the tailor didn't have a whole lot to work with. But I think she looks lovely. He even embroidered a little bird on the back pocket of her jeans. Which brings us to the last hand-sewing lesson:
8. It is wonderful to have a husband who knows how to use a sewing machine.
But it was all worth the pain and permanent scarring. Betty seemed pretty happy at her new home, with her new pal. Who promptly started chewing on Betty's arm. I think that means Olivia likes Betty, too.
Friday, December 15, 2006
Another thing on the pre-holiday To Do list
(Found through Paper Forest)
On my way to an appointment and waylaid by the computer. As usual.
Tuesday, November 21, 2006
Seeing Stars Again
My full directions for this project are here...
Yesterday, I realized there was one more thing in the office left undone, so I drywalled the closet... (cue music now)... All By Myself. I am so proud of my inner contractor. Now I have only to primer and paint the closet, and together we must cut and paint the molding and trim for the room, and hang a few shelves... and then we're done. The holiday weekend and impending obligations may or may not interfere, but I think we're in single digits now, so that I should still be back in the office by the beginning of next week. What a relief it will be to really get back to work, and to have all of my supplies at my fingertips again.
Not to mention having the rest of the house back from its current state as storage facility.
Thursday, November 09, 2006
Oh, Starry Table, How I Love Thee
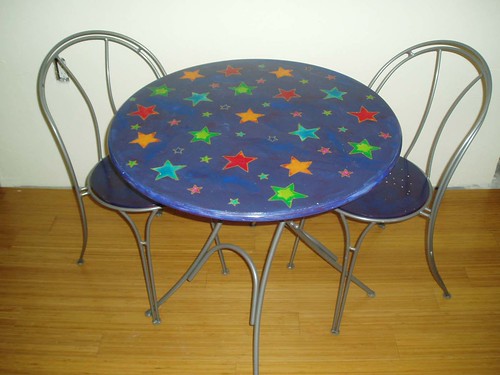
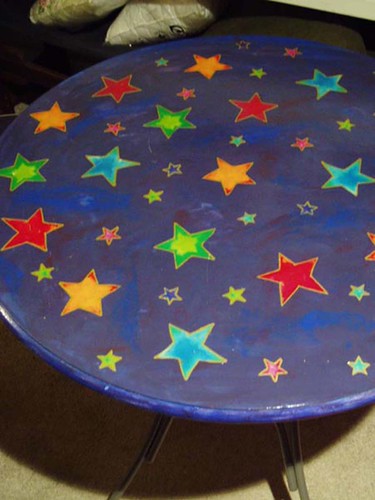
This was my first decoupage project ever and I did it on the fly with a few materials I was given for free. I just did it because I thought I could. I didn’t do a lot of research into decoupage, nor did I worry too much about the process as I was doing it. Since then, I have tried a variety of decoupage techniques, but I find the simpler, the better, and I tend to use these very same steps. I am always learning, though.
The table was a hand-me-down from someone who purchased it at Ikea, but I can’t find it any longer on the Ikea site and, sadly, I’m too far away to go look for myself. But these techniques should work with any wood furniture. If you're really attached to the furniture and/or a perfectionist, you may wish to practice on something else first.
Supplies needed:
table and chairs, sandpaper, paper cutouts to be decoupaged, gesso, acrylic paints, glue (Mod Podge or other decoupage glue), polyurethane, brushes
The simple steps:
1. Take everything apart and sand the wood.
2. Cover with gesso and then paint.
3. Glue paper shapes to the painted surfaces with mod podge.
4. Varnish with many layers of polyurethane.
The detailed steps:
Preparation:
1. Unscrew table top from base and chair seats from frames.
2. Lay the table top and seats on a tarp or other okay-to-get-paint-on-it surface.
3. Sand wood lightly.
Painting:
4. Cover all to-be-painted surfaces with gesso.
(If you’re unfamiliar with gesso, it’s acrylic primer found in art/craft stores and pronounced “jesso,” as I learned when I had to buy it the first time for myself and asked for “gesso” with a hard “g.” In my opinion, you don’t need expensive gesso, paint or brushes for this project. Buy them cheap. I used the cheap black foam brushes and threw them away when I was done.)
5. Paint all to-be-painted surfaces with as many coats as you need to achieve the hue you want. Let dry between each coat, unless you want to blend colors, in which case, apply the colors at the same time.
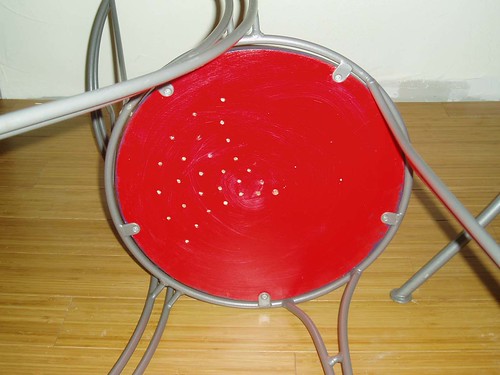
(I used only blue and red on this. I painted the underside of the table and chair seats red and let them dry. Then I painted the top surfaces with both colors: I mixed the blue and red on a tray to make purple, then blotched together red, blue and purple on the table, and blended them to get the look I wanted. I also went for a scratchy look, which has been great as I've moved the table from place to place - any dings looks sort of intentional. To know the drying time for each coat of gesso, paints, glue and polyurethane, read the manufacturer’s instructions.)
Decoupage:
6. Cut out the paper pieces while the paint dries.
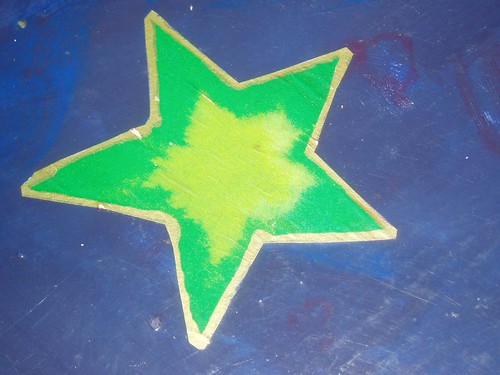
(I cut these stars out of wrapping paper. I really like using wrapping paper, because it’s so thin that, if you get bubbles as the paper gets wet with glue, you can sort of crush them out with your hand. You will usually end up with a crinkly effect, but I like that look, and at the end, the finish will make the whole table very smooth to the touch. If you want it to look and be smooth from the start, try heavier paper and carefully smooth it out from the inside to the outer edge. If you use magazine cutouts, be warned that the text or images on the back might be visible through the paper.)
7. Spread Mod Podge or some other decoupage glue over the surface in a thin but total layer. Lay the paper pieces on the table in the arrangement you want. Spread another thin layer of the glue/podge on top of the paper pieces. Let that dry.
(If you do see bubbles you don’t want after the glue dries, the recommended technique is to cut a tiny “x” with a craft knife and push a little glue down there before putting the “x” back together so that the edges of the x overlap. I have tried this with mixed results. As for the glue, different decoupagers have their favorite products, such as wallpaper paste, spray adhesives and others. I like Mod Podge, and have not had any problems with it)
Finish:
8. Finally, I coated everything with three or four thin layers of polyurethane. This is the part of the process that takes the longest, because of drying times between coats.
(I used Anita’s Water Clean-Up Polyurethane and found that an 8 oz. jar was more than enough for this one project, but you can buy a gallon of polyurethane at a paint store if you like. The very best thing about this finish is that every time I’ve discovered a water ring or such on the table, I have just brushed another coat of polyurethane on the table and the mark has gone away.)
9. I recommend waiting at least 24 hours to use it even if the whole thing is dry to the touch.
Saturday, October 28, 2006
Glue Ikea to Art
This to That
Wish I'd known that existed a lot sooner. And what a perfectly named web site.
And this:
Ikea Hacker
which makes me very happy. I've "hacked" much furniture, but the table below is one of the things that I know came from Ikea originally (although I wasn't the one who made the purchase; it was a hand-me-down, but I was the one who decoupaged it). I actually miss Ikea for the little things and cheap curtains, a lot, even though I swore I'd never buy Ikea furniture again after a certain disaster with a should-have-been-beautiful desk.
I adore this table, though. It is my single favorite piece of furniture that I own.
Friday, October 27, 2006
Unusualities
On the other hand, I have long been of the opinion that if you can't afford something you want, then make it. You know how I'm impressed by people who knit scarves? Well, now I am really impressed.
Friday, July 21, 2006
Project File Cabinet

So I brought it home, assembled it incorrectly a few times (no, I don't do directions well... I'm a trial and error person, myself) and then finally got it together.
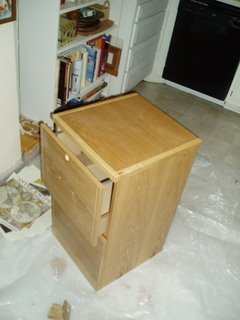 And then, even though it actually looked nicer in reality than on the box, I promptly sanded it down, because I never can leave well enough alone, and started plastering it all over with gold wrapping paper, followed by these Maxfield Parrish calendar pages I've had lying around for five years. Finally, a chance to use them!
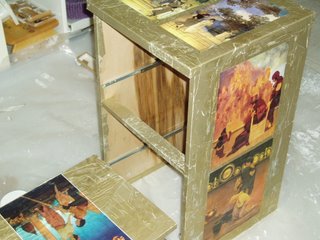
But then I realized, uh, uh-oh, didn't check the placement of the handles on the drawings before I so blithely plastered (and varnished) everything down.
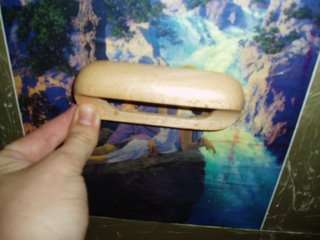
So I had to improvise, and used picture hanging wire to make my own handles.
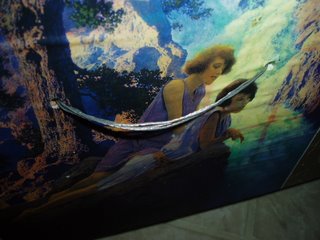
That has its own problems. This drawer (above) is okay, but now on the top drawer (see below), it seems as if the girl on the left is chained by the neck to the lamppost on the right. But, ah, there's not much I can do for her at this point, and at least she still has a head. After all, she could have been decapitated by the stock handle.
I won't post a closeup, because, really, I don't want to traumatize anyone.
But here's the final product:
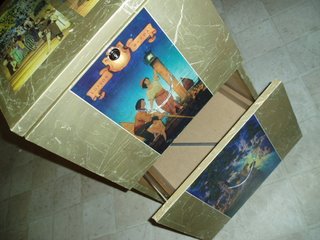
Overall, I'm pretty pleased. I think it looks darn good in reality, even with the, um, unfortunate fate of the girl on the left. If I didn't need the cabinet to be functional so quickly, I would add more trim and decoration, perhaps a little paint, but I'll take it as it is.
Friday, July 14, 2006
The delight is in the giving...
This is the card to go with the gift I mentioned here...
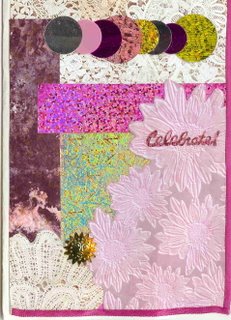
and this card will be going to another birthday girl...
 along with this: